The Alembic Strat-o-blaster: The Preamp That Helped Shape the Grateful Dead's Sound
- Ryan
- Jun 7, 2023
- 6 min read
Updated: Dec 20, 2023
Edit 11/16/23: The legendary Michael Wald (Waldotronics) reached out and brought to light a ton of new information about Alligator and the use of the blaster. Some of my information below is outdated and I'll revisit this article in a future time. Until then, check out Michael's site here: http://waldotronics.com/alligator.html
Original post: Jerry Garcia was a legendary guitarist and a founding member of the Grateful Dead. He was known for his unique playing style, often incorporating feedback and improvisation. Garcia was also a gearhead, always experimenting with new instruments and equipment.
In the early 1970s, Garcia began using an Alembic Stratoblaster in his guitar. The Stratoblaster is a preamp that boosts the signal from the guitar, giving it more output and sustain. Garcia used the Stratoblaster to create a brighter, more aggressive sound, which he used to have a significant effect on songs like "Fire on the Mountain" and "Truckin'."
From alembic.com
"Blaster Features include:
Gain adjustable from 3-14dB
Isolates capacitance of cable
Frequency response of guitar not affected by volume
Very low battery drain (~100µA)
Battery life ~10 months"
The Stratoblaster became an essential part of Garcia's sound, and he used it on many of the Grateful Dead's most famous recordings. It can be heard on albums like "Europe '72," "American Beauty," and "Workingman's Dead." Most famously, the Stratoblaster was installed in his Alligator guitar.

Side note, the Stratoblaster was renamed to just "Blaster" likely to comply with Fender's copywrite on "strat." To cover my own butt too, Strat® is a registered trademark of FMIC.
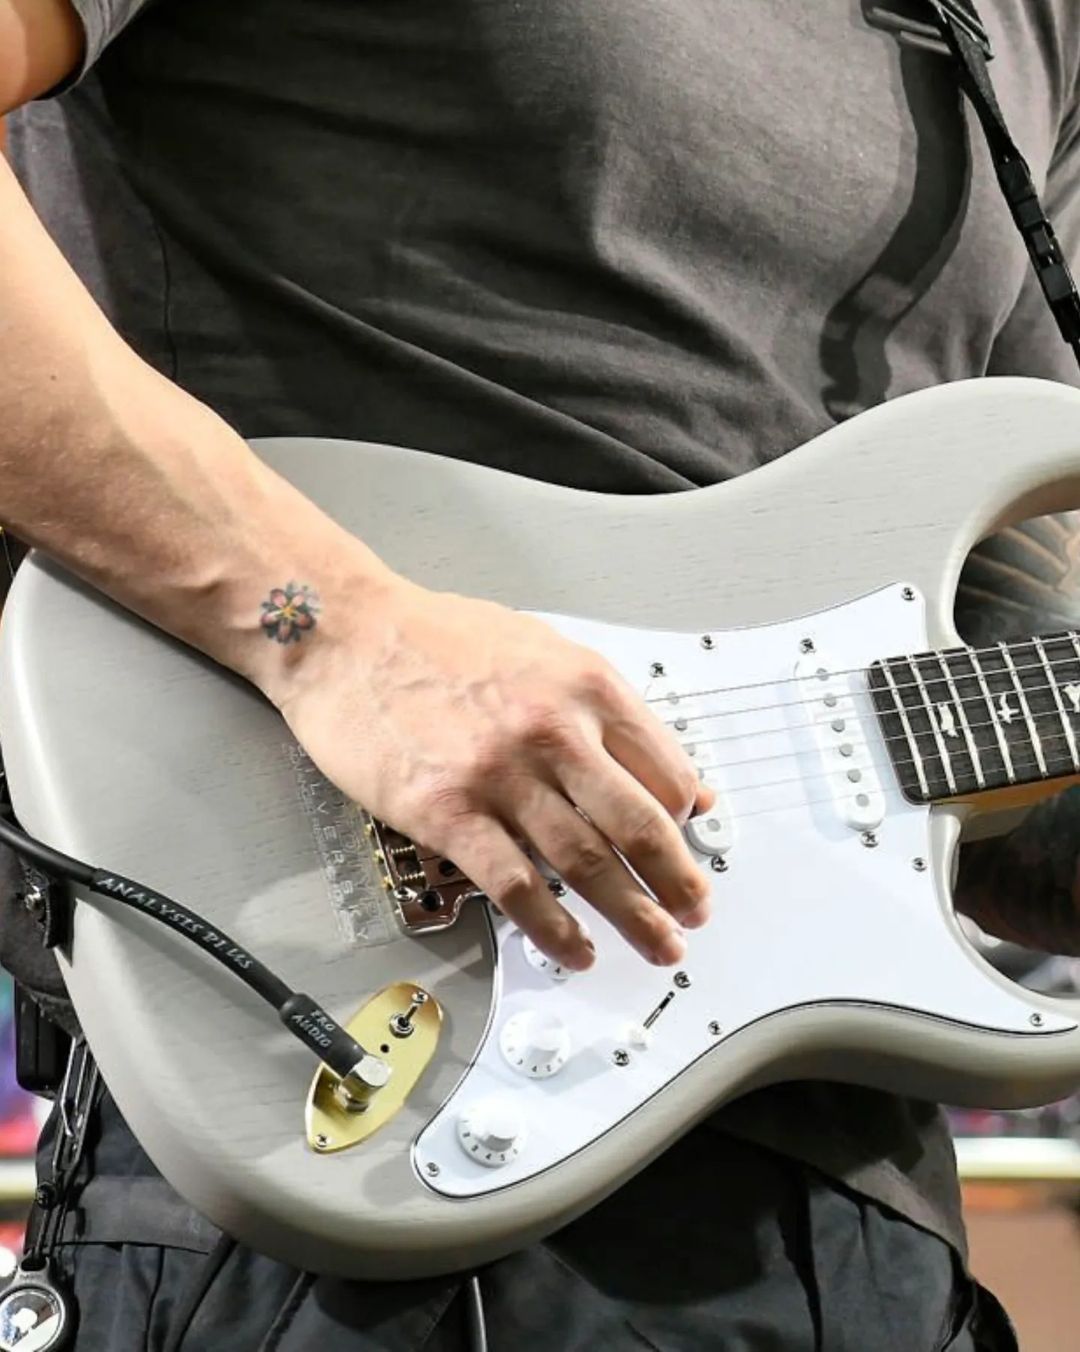
Fast forward to 2023, John debuted a new Silver Sky prototype during Dead and Company's latest show, at the New Orleans Jazz & Heritage Festival.
From JohnMayerGear on Instagram
"The guitar had some interesting modifications:
- The regular jack was replaced with what seems to be an Alembic Blaster (also known as Strat-o-blaster) jack/circuit: this is a FET based buffer/boost that can be switched on and off. Jerry García's 'Alligator' guitar had one of these circuits inside the brass pickguard.
- This is also a hardtail guitar, which is a first for a Silver Sky. The bridge is a regular PRS bridge.
- The guitar has a string retainer bar. This might be another nod to the Alligator guitar.
- Finally, although the color is Moc Sand, the finish looks different enough to not be considered either Satin or Gloss."


Of course, this piqued my interest and I really enjoy the JCF Super Eagle preamp in my PRS guitar named the "Pseudo Eagle" and you can read more about it here: https://www.thetonegeek.com/single-post/my-prs-ce24-semi-hollow-to-super-eagle-style-conversion The Alembic Blaster circuit is fairly simple and well documented online. I would have been perfectly happy with buying a DIY board and brass plate HOWEVER it seems like no one is offering such a thing so I felt compelled to design and build something myself.
Designing The Pew Pew Preamp
I had a few design goals in mind after reading up on the Blaster circuit and how others have evolved the circuit independently. I knew I could design the circuit in a way to add or omit resistors or change a resistor value to stay true to the original, or slightly modified. Some folks even put the blaster circuit inside a pedal which is interesting! You do not have the benefit of removing the cable capacitance however, you could still give your signal a little boost FET circuit.

You can observe in my notes the different variations and some alternatives that can be suggested based on your level of tone magic you may read about on the forums. For example, using all carbon composition resistors will be closest to matching the Blaster circuit from the 70s. You can stabilize the component drift and balance tonal qualities by using carbon film resistors if you'd like. The newest version of the official Blasters uses Metal film resistors. The metal film resistors will offer the theoretically lowest noise and the tightest tolerance.
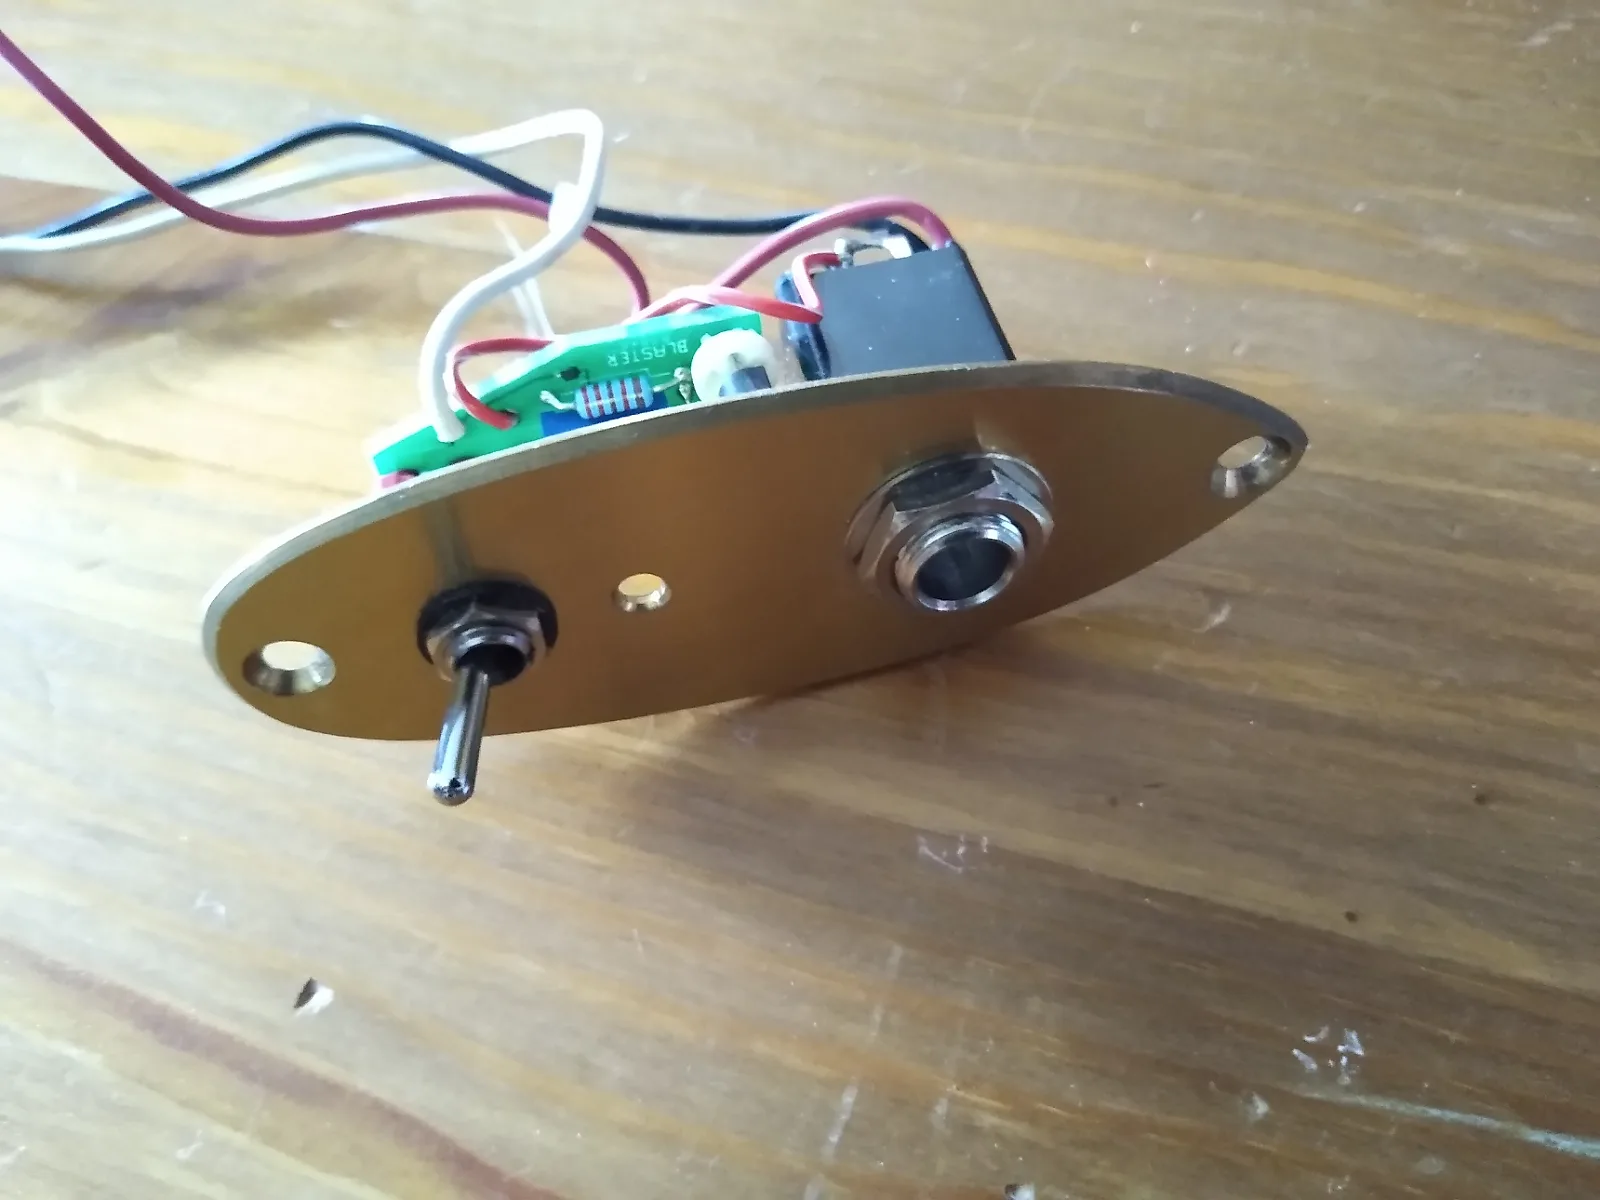


It took me a little while to figure out what to do with the jack plate. I looked all over the internet for a DIY brass jack plate and the only thing I could find is Farm Pedals OBEL plate. https://reverb.com/shop/farm-pedals I reached out to them and they respectfully declined to make a brass jack plate for a Blaster-style preamp. I ended up finding a DXF file (CAD format) of a Fender Stratocaster's jack plate and I converted it to my PCB software. I took measurements of my personal Stratocaster and had a few friends of mine measure their PRS Silver Sky jack plates to get measurements I can use for a jack plate that would work on both types of guitars. It turns out that the PRS jack plate is pretty much compatible and vise-versa with a Stratocaster jack plate! Here is a 1:1 PDF that you can print out to check compatibility with your guitar setup.
Another thing I wanted to do is to make sure the jack plate uses 1.6mm PCB material is that it's really sturdy and will not crack or fail. I believe I achieved this by using two layers of copper that connect to each other, creating a ground plane to reduce interference. The top-facing layer is full copper while the bottom is in a grid pattern. The idea is that the grid pattern will allow some flex in the PCB and the full copper top will be flat and resistant to scrapes. I also exposed the copper around the jack and filled it with copper so it would create a solid ground connection.


Testing out my jack plate design proved that the methods actually worked really, really well! Almost no flex in the plate and a solid ground connection is made.
DIY and/or Prebuilt Resources
If you're putting one of these in your guitar from a pre-built unit, or going full DIY mode, it's good to get familiar with what's going on inside. Here are some resources I make available to you to help out.
Here is the bill of materials (BOM) of all the components inside and where to buy what. If you're unfamiliar with Tayda Electronics or Mouser, you only need to click one of the links and order from that particular site. The Tayda link has a few extra components to meet the $5 minimum purchase. Mainly it includes carbon film resistors AND metal film resistors in the order. Choose carbon film (tan) resistors if you believe in mojo in components or have another reason to use them. Use metal film resistors for tight tolerance and lower (theoretical) noise floors.
https://docs.google.com/spreadsheets/d/1vmMETo8T0pmfzqf8RV3R6-V5apPb6fl73-vXYna50_Y/edit?usp=sharing
The biggest challenge for you will be where to come up with a 9V source. Here are a few ideas:
Rechargeable Battery Pack by Fishman: https://amzn.to/3MT99rH
EMG External 9V Power Unit https://www.emgpickups.com/accessories/power-supplies/es-918.html
A few creative ways in a Stratocaster and/or Silver Sky


Populating the circuit board (DIY Only)
I recommend starting off with the original component selection and omitting the 1M5 & 100ohm resistor for now. You can always add them later. The only issue with the 1M5 (or 4M7) is that the resistor is in parallel with your volume pot which will reduce the top end of your tone. For example, a 250k volume pot + the 1M5 resistor will reduce the volume pot to 214.29k. This might be a cool trick if you're trying to dial in a specific pot like how PRS does with their silver sky and a 300k pot. More about that analysis here.
For you clever folks who are trying to fit this preamp in a pedal, the pop resistor (try to go as high value as you can) could be useful or not at all depending on the quality of your 3PDT.
J201 vs 2N5457 Tone: The J201 seems to be a hair "bigger" on the low end of the tone spectrum. It sounds really good! 2N5457 is a little bit neutral to my ears and my testing. It could be simply the gain of the JFET itself so if you're into experimenting, feel free to socket Q1. You can't go wrong with either so be confident you're going to get great tone by installing and ripping away!


Kindly remember: In this design, you can unplug the battery from the circuit by simply disconnecting the output jack. This will save you from needing to replace the battery more often so don't forget!
Realtime build video to accompany the DIY PCB.